Android studio is a IDE specially used for android app development with lots of features and services. It can run the developed app on an internal simulator which will consume your pc resources. As an effect, causing the app to run slow. To avoid this issue, there is one more feature it provide. We can connect external device using wifi or usb in android studio for development purpose.
In this article, we will discuss how to connect external android device with android studio using wifi and usb. We’ll also go through some advantages of choosing one over other.
Advantage of external device integration in Android Studio
Here are some of the important advantages of using external device over the emulator:
Solves device specific issues: External device allows users to test the app on actual hardware. So, it’s easy to test behaviour of specific version of hardware or sensors.
More accurate testing: Testing the app on external device allows access to touch, network, battery testing. We can also take heating measurements which is not possible in emulator.
Increased performance: Testing on separate device will consume separate resources from your pc, eventually causing less resource consumption of your pc and making the compilation and development process even faster.
Faster compilation: When using emulator, studio has to import external packages which will increase the amount of code that has to be compile to run the app.
How to connect external device with android studio?
Now, lets take look at possible ways to run an android app on external device. We need to check few things before getting start.
1. Enable developer options
By default, developer options are disable on every android device. To enable them,
- go to settings
- search for about device
- find build number
Build number lies in different places depending upon brand and model. Once you find it, keep clicking on it until a popup appears that asks for phone password. Once you enter it, a toast appear with message “You are now a developer”. Now that you have enabled developer options, let’s connect with android studio.
There are primarily two ways to connect android device with wifi and usb in android studio. We’ll go through them both one by one. You can choose your preferred way.
2. Connect using usb
For this method, you need to first enable usb debugging. To do that, again go to developer options from settings, search for usb debugging and enable it.
Now, make sure Android studio is up and running then connect your device to pc with supported usb.
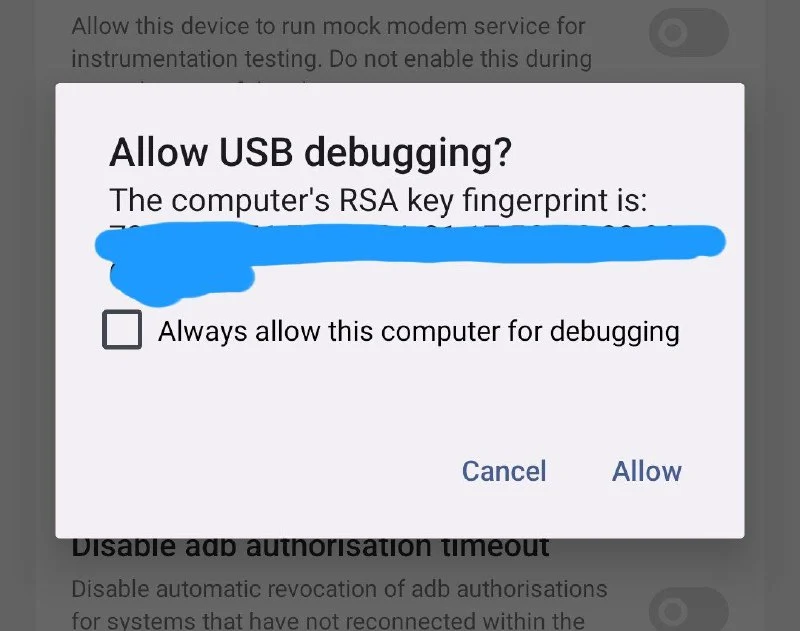
If everything goes good, you will see a prompt asking for required permissions as shown in below screenshot. Allow all the permissions on the phone

In Android studio, you will see connected device name with green dot as shown in following image. Select the device from dropdown and press the play button to run the app on connected device.

That’s it, you can debug and test your android app from your phone.
3. Connect using wifi
Prerequisites
- An updated android device with developer options enabled.
- Android device and pc must be connected to same wifi network.
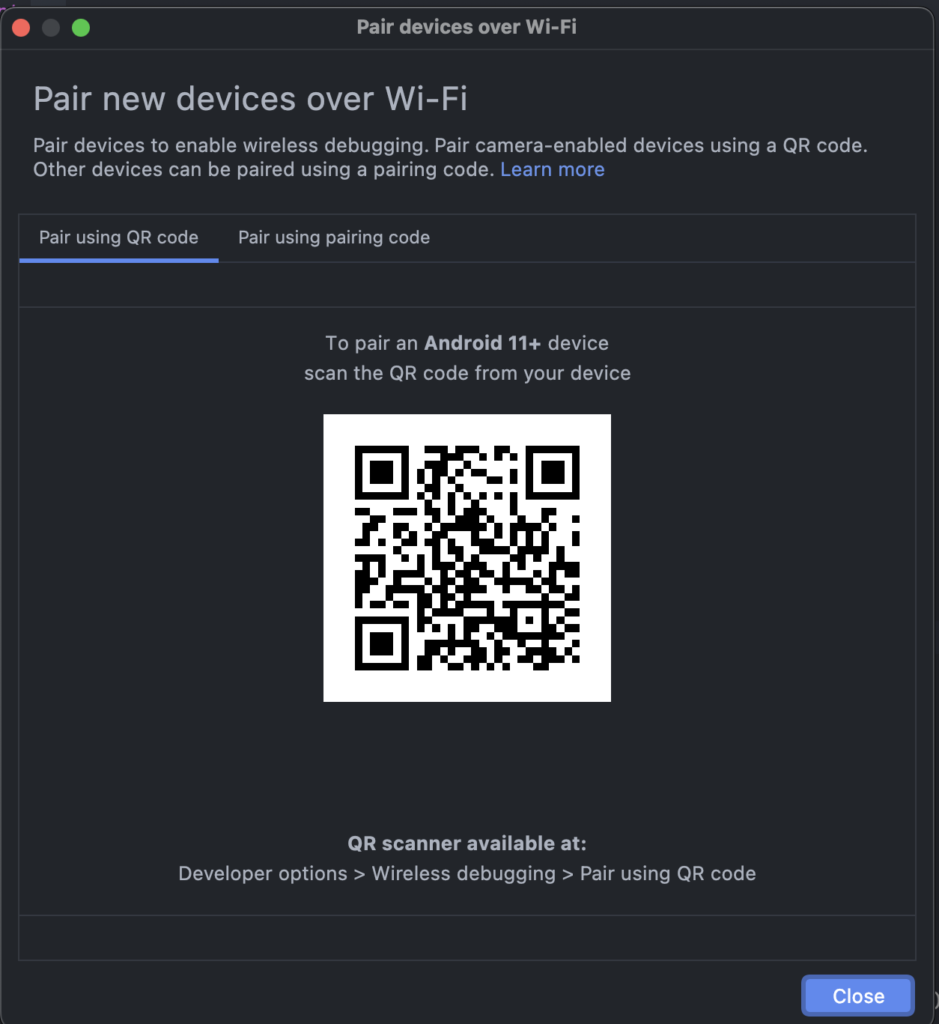
Once above prerequisites are checked, search for developer options in settings, in debugging section look for wireless debugging, turn it on. Click on “Pair device with QR code” and a scanner camera will open in your device.
At this point, go to your android studio, click on “pair device using wifi”, you will see a QR code on screen which you have to scan from your device as shown below.


Now, the connected device will be visible in devices dropdown. Choose the connected device and run the app with play button. That’s it, android studio will now connect to android device. you can also use “Pair using pairing code method” the same way.
You can also debug a webWPA app using chrome dev tools. Checkout this article for more information.
Conclusion
Through this article we’ve covered following points.
- Advantages of using external device over emulator in android studio
- How to connect external device using usb
- How to connect external device using wifi
Thank you for reading this article, please leave comments if you have any doubts. Will try to resolve as soon as possible.